Thank you for purchasing one of my Google Earth Route Guides! You should receive an email with a link to download the file within a few minutes. If you don’t, contact me!
Your download is a .KMZ file. This is very similar to .html files that are used to create websites. It can be opened in a text editor if you just wish to read the information however the best way to use a .KMZ file is with Google Earth on a computer (does not work well on smartphones). To get started, open Google Earth and then ‘File’ and ‘Open’. Find the .KMZ file that you just downloaded and hit ‘Open’!
Your new route will now be visible in the ‘Places’ Menu, usually on the left side of the Google Earth window. If you double click on the route in the menu, the globe will automatically centre itself over the area. It will be a bit cluttered and intimidating at first!
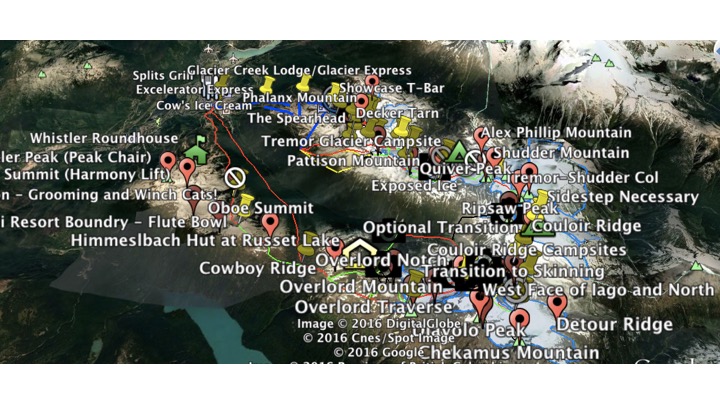
When you first open your route in ‘Places’, it will be cluttered with lot’s of labels!
1) To make things a bit easier, let’s get rid of some of the labels. First, in the ‘Places’ menu, un-check all the boxes except for ‘Read Me First’ and ‘Route Lines’. This will get rid of Peak Names, Landmarks, Glaciers, and the rest of the labels that you can add back in later to get more information.

Uncheck all the folders in ‘Places’ except Read Me First and Route Lines.
2) Now, look in the menu box below called ‘Layers’ and uncheck everything except ‘Terrain’. This will remove all the Google Earth labels so we only see what is important for us! Unchecking ‘Terrain’ will switch the map view to 2D so this one I generally leave on.
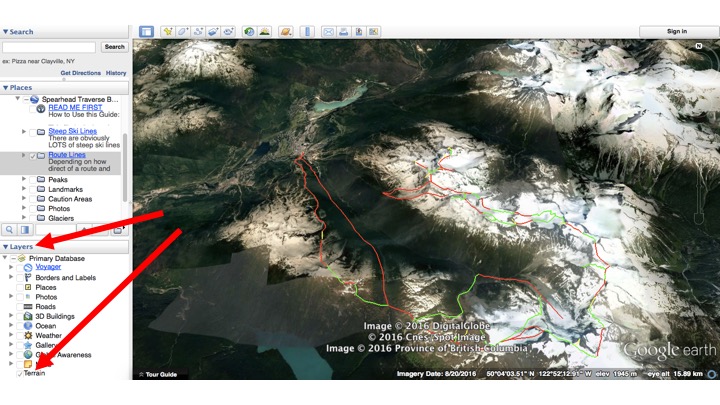
In the ‘Layers’ menu box, uncheck everything except ‘Terrain’.
3) Now you are ready to start exploring the route. I recommend reading the ‘Read Me First’ file because it details all the information needed for where to start the trip, conditions, gear, and more. This is a good jumping off point. From there, you can start navigating through individual parts of the route. Each segment includes a description and stats. If you want to see more detail about a segment, click on it and a dialog box will appear with details.
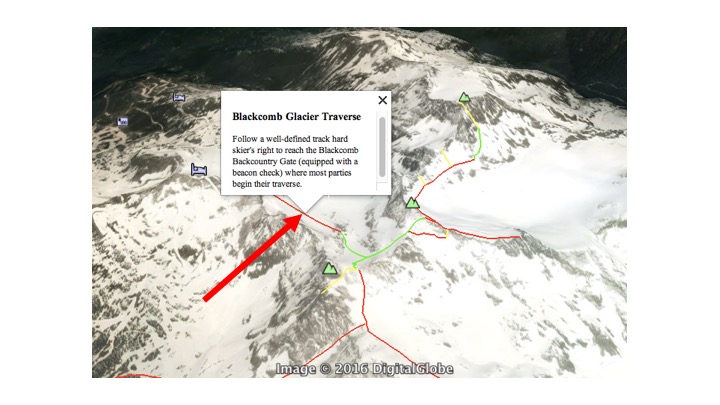
By clicking on the red line indicating a descent, a dialog box appears with more information.
4) You can also see this information by navigating to a certain segment within the ‘Places’ folders. In the menu on the left, you can double click on a segment to get the map to zoom to that location, or right click and select ‘Get Info’ to see the dialog box.
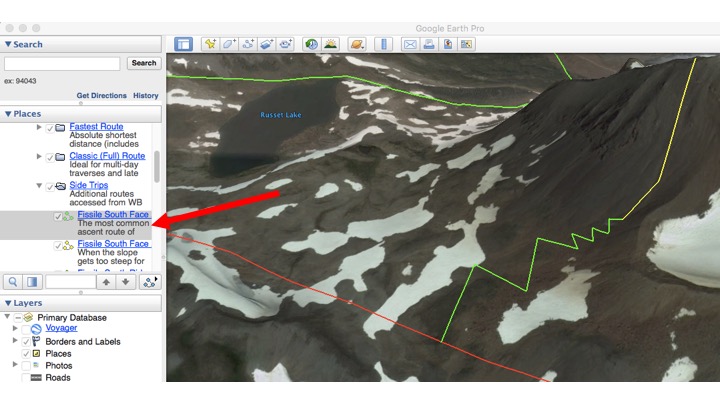
Right click on a route segment in the ‘Places’ box and select ‘Get Info’ to get more information about a segment.
5) That’s all you need to know to get started exploring your route! I recommend first looking at just route lines. Then you can add the ‘Landmarks’ and ‘Caution’ layers to get even more important information!